Welcome!
During this course we will make a Video Game-ready character. Along the way. we will learn how to model in 3D, use materials, and create animations that could be used in games.

Below is a breakdown of our week. The files you need for the course are included, listed by day:
Day 1:
Today we learn what exactly 3D is and how it works. We’ll demonstrate making objects in 3D and arranging them to create a scene.
To get started, follow these steps:
Step 1: Create a folder on your USB drive and name it Blender_modeling.
Step 2: Download the Zip file provided below:
Blender_day01.zip
Step 3: Unpack the files contained in the zip file to the Blender_modeling folder.
Day 2:
Using the files we downloaded on Day 1, we begin making MAL, our robot character.
Day 3:
Today we finish building MAL. We examine materials and shaders, adding color and working with cartoon-style shading tehniques.
If there’s time …
If we have any extra time on Day 3, we may try texture painting a character. Since MAL doesn’t have much room for painting, here is a character that we may want to try:
Jetstream Jack Blender.zip
Day 4:
Now that we have our character built and painted, it’s time to set him up for animation. We’ll talk about how to rig a character up with an armature, giving him a bone structure to prepare him for movement.
Day 5:
Today we bring MAL to life! We’ll create a set of animations for him so that he can float, run and attack. Then we’ll render out his animations so you can show the world your creations!
EXTRA:
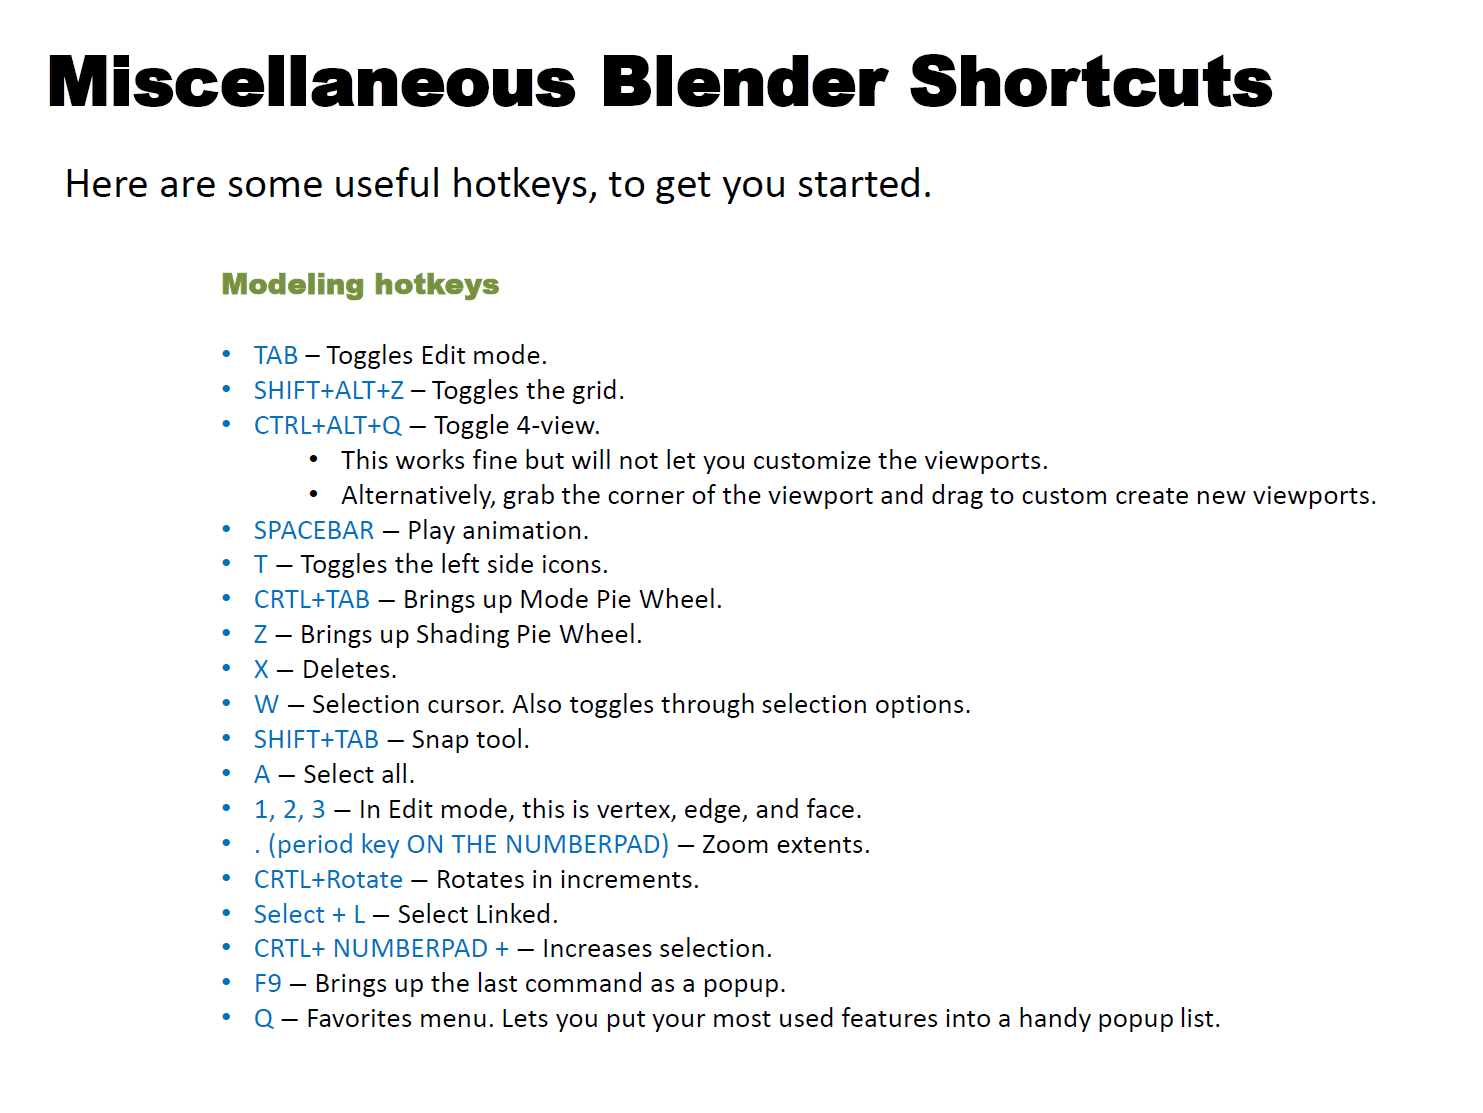
Here’s a quick cheat sheet to useful Blender hotkeys. I will update it as needed throughout the week.